Struggling with sharp pain in your lower back or hips? Try yoga for SI joint relief. You might have SI joint pain, a common issue that’s more frustrating than it sounds.
It’s a common cause of low back pain, affecting 15-30% of people with chronic pain. SI joint pain [¹] can refer to different areas, making it tricky to pinpoint exactly where the pain is coming from.
Yoga could be your secret weapon for relief! In just a few simple poses, you can ease discomfort, improve flexibility, and get back to feeling like yourself.
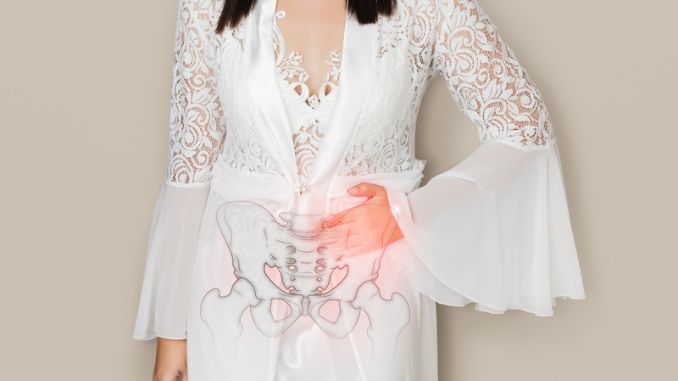
The sacroiliac (SI) joint connects your sacrum and then ilium, playing a key role in movement and weight-bearing.
Additionally, when this joint is inflamed or moves abnormally, it can cause pain and limit mobility.
To ease SI joint pain, it’s important to understand how the joint works. Yoga can help by strengthening the muscles around the joint, improving flexibility, and then reducing stress.
Medical Disclaimer: The information in this blog is for educational purposes only and is not intended to replace professional medical advice. The content in this post is not meant to substitute for a professional diagnosis, advice, or treatment. Consult your healthcare provider for personalized advice on managing medical conditions or before starting any new treatment options.
Yoga Poses for SI Joint Pain Relief
1. Bridge pose
- Firstly, lie on your back on the floor with your knees bent and your feet flat.
- Ensure your shoulders, neck, and then spine remain aligned.
- After that, place your arms at your side.
- Contract your abdominal area, then push from your heels to lift your hips.
Again, hold this position for several deep belly breaths, in through your nose and then out through your mouth.
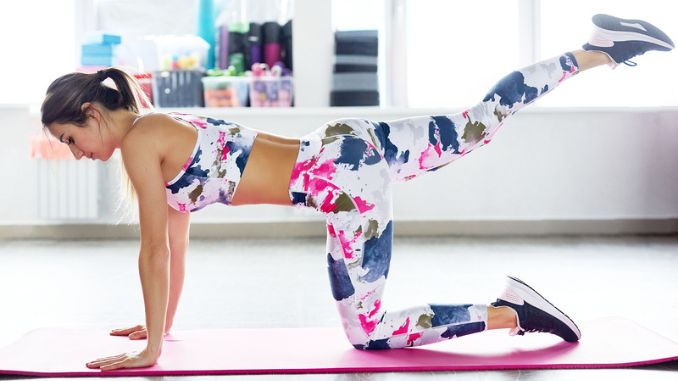
2. Pigeon pose
- Begin in a straight-arm plank position on a yoga mat, maintaining good alignment with your head, shoulders, hips, and then toes.
- Bend one leg in front of your body, bringing your knee up to your elbow and then your ankle against your hip on the opposite shoulder.
- Slowly walk your hands out before you, bringing your upper body to rest over your bent knee and then your head facing the floor.
- After that, hold this position for 30–60 seconds.
- Take several deep belly breaths, in through your nose and out through your mouth.
Furthermore, raise yourself back up to return to the starting position and repeat the movement on the opposite side.
3. Baby Cobra Pose
- Lie on your stomach with your legs straight and then your feet shoulder-width apart, maintaining good alignment from your head to your hips and legs.
- After that, bend your elbows and press both hands on the floor.
- Contract your abdominal muscles and then gently lift your mid-back off the floor, using your hands for support.
Hold this position for several deep belly breaths, in through your nose and then out through your mouth.
4. Seated Forward Fold
- Basically, begin in an upright sitting position on the floor with your legs crossed.
- Maintain good alignment with your head, shoulders, and then hips.
- After that, tighten your abdominal muscles.
- Raise your arms overhead and hinge through your hip to bend your upper body forward, placing your hands on the floor.
- Furthermore, hold the position for a couple of seconds.
Return to the starting position and then repeat the movement 5 times.
5. Triangle pose
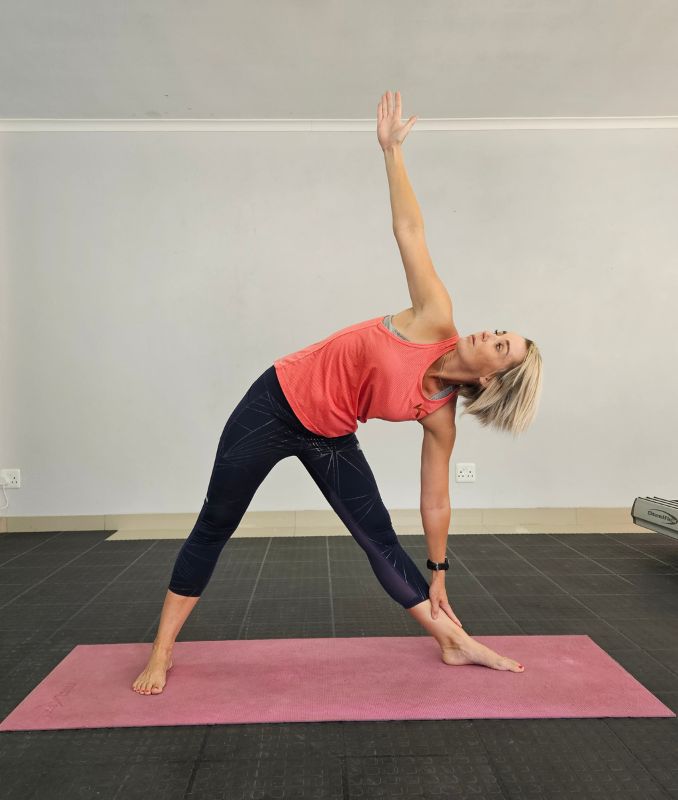
- Basically, begin in an upright standing position with your feet considerably wider than shoulder width apart.
- Maintain good alignment with your head, shoulders, and then hips.
- Extend your arms to the side at shoulder level.
- Turn your left foot out at a 90-degree angle.
- Engage your core muscles.
- After that, slowly bend your upper body to the left side as you reach your left hand to your shin, while your right hand extends overhead.
- Furthermore, hold the position for a couple of seconds.
Relax and then repeat the movement on the opposite side.
6. Warrior 1 Pose
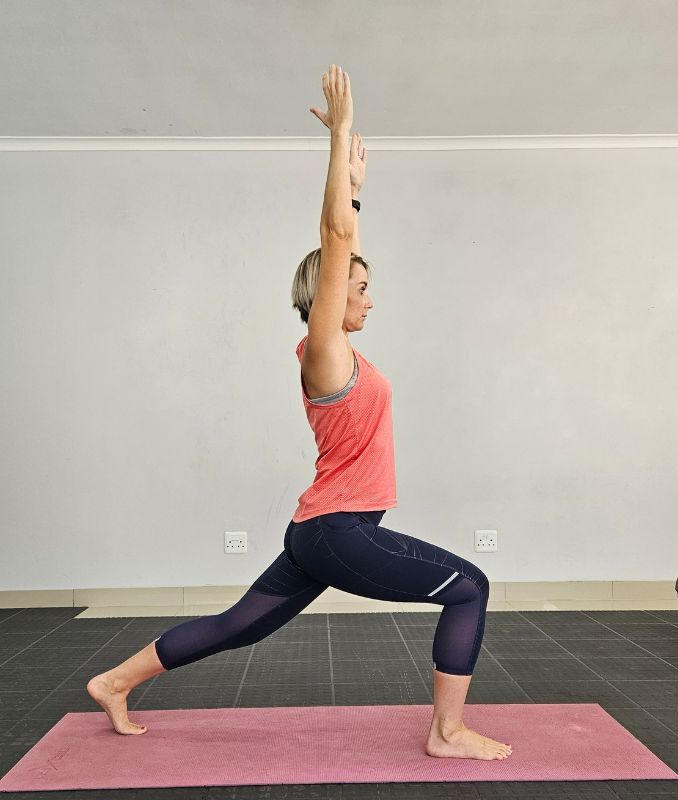
- Firstly, begin in an upright standing position with your feet shoulder-width apart.
- Ensure proper alignment with your head, shoulders, hips, and legs throughout.
- After that, engage your abdominal muscles, then take a big step back with one foot and bend your front knee forward as you raise both arms above your head.
- Hold the position for a couple of breaths.
- Furthermore, raise back up to the upright standing position using your arm for support.
Again, repeat the movement on the opposite side.
These exercises are recommended by physical therapist Annie, who believes that when done correctly, yoga can greatly reduce SI joint pain and then enhance overall joint health.
Precautions While Performing Yoga
- Consult your doctor first.
- Start with gentle stretches and then gradually progress to more advanced poses.
- Don’t force any poses.
- Maintain proper body alignment.
- Use props for extra support.
- Focus on deep breathing.
- Stop if it hurts.
- Avoid overstretching.
- Practice consistently, rest often.
- Drink water before and after.
Understanding Sacroiliac Joint Pain
Sacroiliac joint pain (SI joint pain) is a common condition affecting millions of people worldwide, causing discomfort, stiffness, and then limited mobility in the lower back and hips.
SI joint pain can make simple tasks like standing, sitting, or walking very painful.
Identifying the cause is key to finding the right treatment and then preventing more damage.
Furthermore, managing SI joint pain may include physical therapy, yoga, and lifestyle changes to improve joint health and then reduce discomfort.
Causes of SI Joint Pain:
- It can be caused by factors such as leg length differences, older age, arthritis, past spine surgeries, pregnancy, or trauma.
- It can be caused by activities [²] like jogging or high-energy trauma (e.g., car accidents).
Impact of Aging and Gender:
- Women tend to develop SI joint issues earlier due to hormonal changes and then body structure differences.
- Additionally, men typically experience degenerative changes around age 40 [³] while women experience them around 50.
Symptoms of SI Joint Pain:
- Pain in the lower back[⁴] hips, or pelvis that worsens with standing or sitting for long periods.
- Stiffness or a limited range of motion in the lower back or hips.
- Pain that radiates to the buttocks, groin, or legs.
- Pain while climbing stairs or bending forward.
- Difficulty getting in and out of a car or performing daily activities.
- Increased discomfort during activities like walking or lifting.
Benefits of Yoga for Pain Relief
- Yoga relieves SI joint pain and then stress.
- Strengthens muscles around pelvic and then hip bones.
- Improves flexibility and supports joint health.
- Poses like bridge reduce pain and tension.
- Reduces inflammation and promotes circulation.
- Enhances body awareness, preventing further pain.
- Eases stiffness in pelvic and hip bones.
- Increases mobility and then reduces discomfort.
Conclusion and Next Steps
Adding yoga to your routine can greatly reduce SI joint pain and then improve joint health. With help from a healthcare professional, you can create a yoga practice that works for you.
Be patient—relief is possible, and consistent yoga practice can alleviate pain and then improve joint health over time.
Furthermore, the more you practice, the more you’ll understand your body and find lasting relief, so you can live a healthier, active life.
Jumpstart your healing with our 14-Day Joint Recovery Quick Start Program – now available as a convenient digital download! Reclaim mobility, reduce stiffness, and support healthy joints from the comfort of your home.

Frequently Asked Questions
Yoga can be helpful for SI joint dysfunction. It may improve flexibility, strengthen muscles around the joint, and reduce pain. However, it's important to practice the right poses and consult a healthcare provider to make sure it's suitable for you.
The best exercise for an SI joint depends on your condition. Gentle stretches and strengthening exercises, like pelvic tilts and bridges, can help support the SI joint. It's best to focus on movements that don't cause pain.
Downward dogs can be beneficial for some people with SI joint pain, as it stretches the back, hips, and legs. However, if it causes discomfort, you should modify it or avoid it. Listen to your body and consult a professional if unsure.
Self-releasing an SI joint often involves gentle stretches, like the figure-four stretch or using a foam roller to target the lower back and hips. It's important to move carefully and avoid forceful adjustments. If you're experiencing significant pain, it's a good idea to seek professional advice.
References:
Cohen, S. P., Chen, Y., & Neufeld, N. J. (2013). Sacroiliac joint pain: a comprehensive review of epidemiology, diagnosis and treatment. Expert Review of Neurotherapeutics, 13(1), 99–116. https://doi.org/10.1586/ern.12.148
Thawrani, D. P., Agabegi, S. S., & Asghar, F. (2019). Diagnosing sacroiliac joint pain. Journal of the American Academy of Orthopaedic Surgeons, 27(3), 85-93. https://doi.org/10.5435/JAAOS-D-17-00132
Prather, H., & Hunt, D. (2004). Sacroiliac joint pain. Diseases of the Musculoskeletal System, 50, 670-683. https://doi.org/10.1016/j.disamonth.2004.12.004
Szadek, K. M., van der Wurff, P., van Tulder, M. W., Zuurmond, W. W., & Perez, R. S. G. M. (2009). Diagnostic validity of criteria for sacroiliac joint pain: A systematic review. The Journal of Pain, 10(4), 354-368. https://doi.org/10.1016/j.jpain.2008.09.014